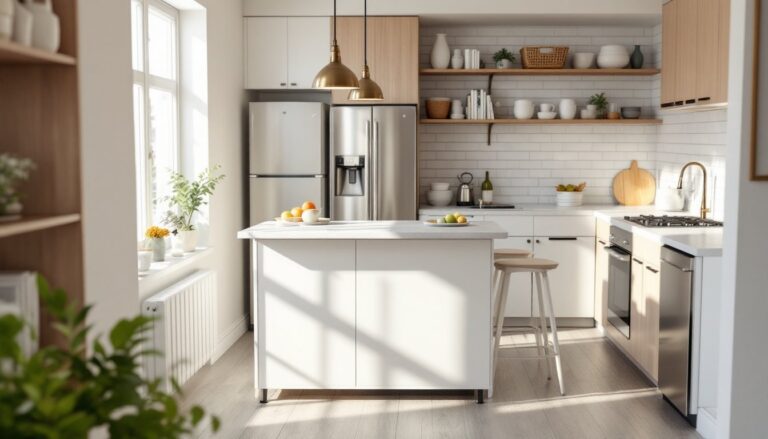
An interior design finish schedule isn’t a fancy designer-only tool, it’s a practical roadmap that keeps your whole project moving forward without surprises or costly mistakes. Whether you’re updating a single bathroom or tackling a full home renovation, a finish schedule template tracks materials, delivery dates, installation timelines, and finishes so nothing falls through the cracks. This guide walks you through what belongs in a finish schedule, how to build one from scratch, and how to use it to stay organized from day one.
Table of Contents
ToggleKey Takeaways
- An interior design finish schedule template is a practical tracking document that logs every material, specification, delivery date, and installation timeline to prevent costly mistakes and project delays.
- Include specific details like brand names, exact color numbers, product finishes, quantities, and lead times for every material—vague descriptions like ‘marble-look tile’ lead to ordering errors and mismatches.
- Build your finish schedule by breaking down the project room-by-room, creating columns for specifications and timelines, confirming prices and lead times with suppliers, and adding a 10–15% buffer for potential delays.
- Assign one person to maintain and update the finish schedule throughout the project, using a shared digital format so contractors, designers, and suppliers all reference the same source of truth.
- Review your timeline for bottlenecks and dependencies—for example, custom cabinetry must finish before countertop fabrication begins—and adjust installation dates if materials arrive late.
- Check materials against your schedule when they arrive, mark items as received and inspected, and maintain detailed notes on changes or special instructions to create a complete project record for future reference.
What Is An Interior Design Finish Schedule And Why It Matters
A finish schedule is a detailed spreadsheet or document that lists every material, fixture, paint color, flooring type, and hardware specification needed for your project. It serves as the bridge between design decisions and actual installation. When you order flooring, specify paint colors, select light fixtures, or coordinate cabinet hardware, everything gets logged so no two rooms end up with conflicting materials, and so you’re not scrambling at the last minute to track down a discontinued tile.
Why does this matter? Contractors, designers, and suppliers need consistent information to order materials with accurate lead times. A single finish schedule becomes the source of truth that everyone references. Without one, you risk ordering the wrong paint sheen, receiving tile that doesn’t match your samples, or discovering that your chosen countertop has an eight-week lead time right when you’re ready to install. For DIY projects, it prevents the frustrating back-and-forth of “What was that hardware finish we picked again?” A well-maintained schedule saves time, money, and the sanity-test that comes with a disorganized renovation.
Key Components To Include In Your Finish Schedule Template
Material Selections And Specifications
Your finish schedule must capture specific details about every material, not just the product name, but the exact finish, color, size, and quantity. For paint, note the brand, color number, finish (matte, eggshell, semi-gloss), and square footage to be covered: that information helps you calculate coverage and reorder if needed. For flooring, include the material type (hardwood, vinyl plank, tile), the specific product line and color, thickness, and square footage. For fixtures like light switches, outlet covers, cabinet hardware, and door handles, note the brand, finish (brushed nickel, matte black, polished brass), and count.
Flooring and countertops are serial offenders for vague specs. “Marble-look tile” might sound clear until you’re standing in a showroom with three options. Instead, write “MSI Sparkling White 12×24 polished marble tile, 500 sq. ft. for main living area.” For countertops, specify the material (quartz, laminate, solid surface), the exact color and pattern, edge detail, and whether it includes a backsplash. Custom materials like stained millwork need a finish description too: “Oak stain, matte polyurethane, all interior cabinetry.”
Timeline And Delivery Dates
Paint ship in days: custom cabinetry might take six weeks: tile could be two weeks if in stock. Your schedule needs a column for each material’s lead time and a target delivery date. Calculate backward from your installation date. If drywall finishing happens on week three and you’re painting week four, paint doesn’t need to arrive until week three, but tile for the bathroom must arrive by week two if installation is week three.
Mention realistic delivery windows and confirm them with suppliers. A finish schedule that says “hardwood arrives March 15” without accounting for acclimation time, hardwood typically sits in the space for 7–14 days before installation, creates a scheduling mismatch. Note acclimation periods, curing times (primer and paint often need 24–48 hours between coats), and any dependencies. If cabinet installation depends on countertop fabrication, and countertop fabrication depends on final cabinet dimensions, sequence those clearly in your timeline.
How To Create Your Own Finish Schedule From Scratch
Start with a room-by-room or area-by-area breakdown. List every surface, fixture, and feature: walls (paint color), ceilings (paint, texture, or coffers), flooring, trim, cabinetry, countertops, backsplash, lighting, switches, outlets, doors, hardware, and any special finishes like wallpaper or stain. Create a spreadsheet or table with columns for room, item/material, specification, color/finish, quantity, unit, supplier, cost estimate, lead time, target delivery date, and notes.
Next, walk through your design and fill in specs. If your kitchen is getting white subway tile with light gray grout on the backsplash, note “white subway 3×6 tile, 60 sq. ft., light gray #456 grout.” If the master bath has brushed nickel fixtures, list all of them: faucet, towel bars, robe hooks, shower head, and hand shower with the exact model number and finish. Don’t guess: take photos of your inspiration, color samples, or showroom picks and cross-reference them to product numbers and names.
Once specs are in, reach out to suppliers for pricing and lead times. Update your schedule with realistic costs and delivery dates. Factor in 10–15% buffer time for delays because materials do get held up. Review your timeline: when does each material need to arrive for installation to stay on track? Flag any bottlenecks (e.g., custom cabinetry holding up countertop fabrication). Confirm all quantities one final time, order too little and you’ll wait for a reorder, order too much and you’ve wasted money. For paint, round up slightly because touch-ups happen, but for tile and flooring, order exactly or with a small waste factor (typically 10% for tile, 5–10% for hardwood).
Using A Template To Stay Organized Throughout Your Project
A finish schedule is only useful if it’s updated and referenced. Assign one person to own it, whether that’s you, a contractor, or a designer, and make it the single source of truth for the team. Share a digital version (Google Sheets works fine) with contractors, suppliers, and installers so everyone sees the same specs and timelines.
As orders are placed, update the schedule with confirmation dates and actual delivery dates. When materials arrive, physically check them against the schedule: does the paint color match the spec number, or is it the wrong undertone? Is the tile the right size and finish? Catching errors when materials land beats discovering problems the day before installation. Mark items as received, inspected, and ready for installation.
Maintain a notes column for questions, changes, or special instructions. If a supplier says your flooring will be two weeks late, note it immediately and adjust downstream installation dates. If you upgrade a fixture mid-project, update the spec, cost, and timeline right away. A neglected schedule becomes outdated junk: an actively maintained one prevents chaos. As finishes are installed, date them and check them off. This creates a record of what was used where, which proves invaluable if you need to reorder paint for touch-ups years later or if a homeowner asks what was installed in a particular room. Resources like HomeAdvisor and ImproveNet offer project planning tools and contractor resources that can integrate with or complement your finish schedule.
Conclusion
A finish schedule template is the backbone of organized, stress-free interior design projects. By mapping out materials, specifications, timelines, and delivery dates upfront, you sidestep confusion, prevent costly ordering errors, and keep your team aligned. Whether you’re managing a DIY refresh or a full renovation, a detailed finish schedule transforms a overwhelming checklist into a manageable, trackable workflow that gets results on time and on budget.