A kitchen island sounds like a luxury, something you’d see in a sprawling suburban kitchen with 300 square feet of counter space. But here’s the reality: even a galley kitchen or modest apartment can benefit from an island if you choose the right design. The trick is thinking strategically about footprint, function, and flow. A well-placed island can add prep space, storage, and seating without turning your kitchen into an obstacle course. Whether you’re working with 70 square feet or 120, there’s an island concept that fits. This guide walks you through practical kitchen island ideas for small kitchens, covering compact designs, multi-purpose features, materials, and installation considerations that actually work in tight quarters.
Table of Contents
ToggleKey Takeaways
- Kitchen island ideas for small kitchens work best when designed with a strategic footprint of 24 to 30 inches wide and 4 to 6 feet long, leaving adequate walking space (36-42 inches minimum) for traffic flow.
- Rolling cart islands offer flexible alternatives to fixed designs, ideal for kitchens under 100 square feet where permanent floor space commitment isn’t possible.
- Multi-purpose islands with built-in storage—such as drawers, cabinets, shallow shelving, or narrow appliances—maximize functionality in tight spaces without requiring extensive additional kitchen real estate.
- Light wood finishes, white painted bases, and pale countertop colors make islands visually recede, while intentional material mixing (wood base with concrete countertop and steel accents) creates visual interest without overwhelm.
- Precise measurement of floor levels, appliance door swings, and existing constraints before installation prevents costly mistakes; utilities like sinks and cooktops require licensed professionals and permits, adding significant expense and complexity.
- Peninsula designs or rolling carts are superior solutions for kitchens under 80 square feet, as fixed islands may feel cramped regardless of design choices.
Compact Island Designs That Maximize Function
Narrow, Galley-Style Islands
If your kitchen is long and linear, a slim island running parallel to one wall can work wonders. Think 24 to 30 inches wide and 4 to 6 feet long, narrow enough to leave at least 36 to 42 inches of walking space on either side (local building codes often require 36 inches minimum: check your jurisdiction). A narrow island still gives you a secondary prep zone and a breakfast bar without creating a traffic jam.
Raised seating on one side (typically 36 inches for a counter-height overhang) turns the island into a casual dining spot. Use the underside for deep drawers or open shelving. Many DIYers overlook this: measure your existing appliance door swings before committing. An oven that opens into your island walkway is a daily frustration you don’t want.
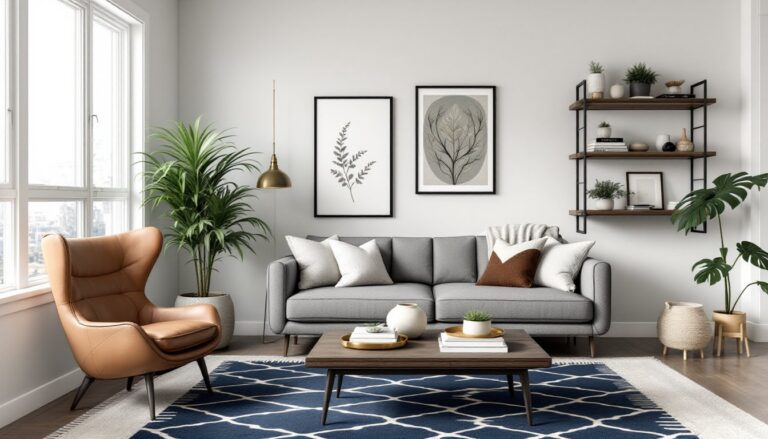
Consider anchoring the island with a darker countertop or base color to visually shrink it. Light wood or white painted bases recede, making the space feel more open. Pair it with matching bar stools that tuck under partially, they’re more forgiving on tight footprints than full-size dining chairs.
Rolling Cart and Movable Islands
Can’t commit floor space permanently? A rolling cart island gives you flexibility. Stainless steel or wood-topped carts on lockable casters (get heavy-duty ones: flimsy casters are frustrating) can slide into a corner when you need the floor clear. They’re ideal for prep work, small-appliance storage, or extra drink service during gatherings.
The catch: rolling islands aren’t structural anchors, so they don’t replace built-in storage the same way. Pair a cart with wall-mounted shelving or cabinets for real storage gains. And yes, you’ll push it around, make sure your kitchen floor is smooth and level, not tilted or uneven. Uneven floors cause carts to drift when you’re not looking, which is annoying in a tight space.
A cart works best in kitchens under 100 square feet. If you have more space and can commit to a fixed footprint, move to a built-in island for stability and resale appeal.
Multi-Purpose Islands With Built-In Storage
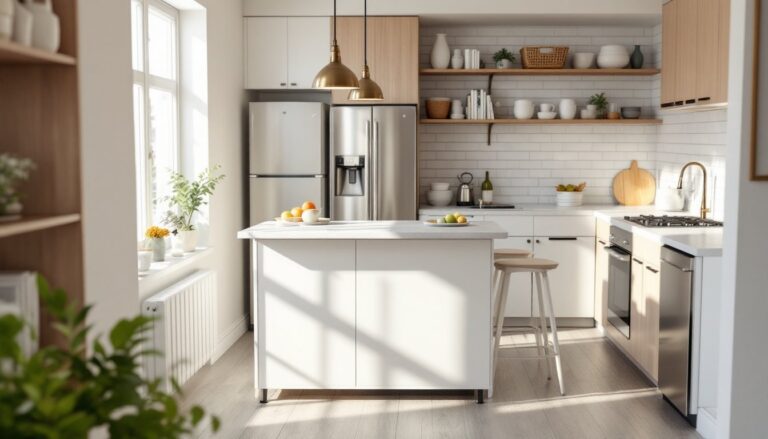
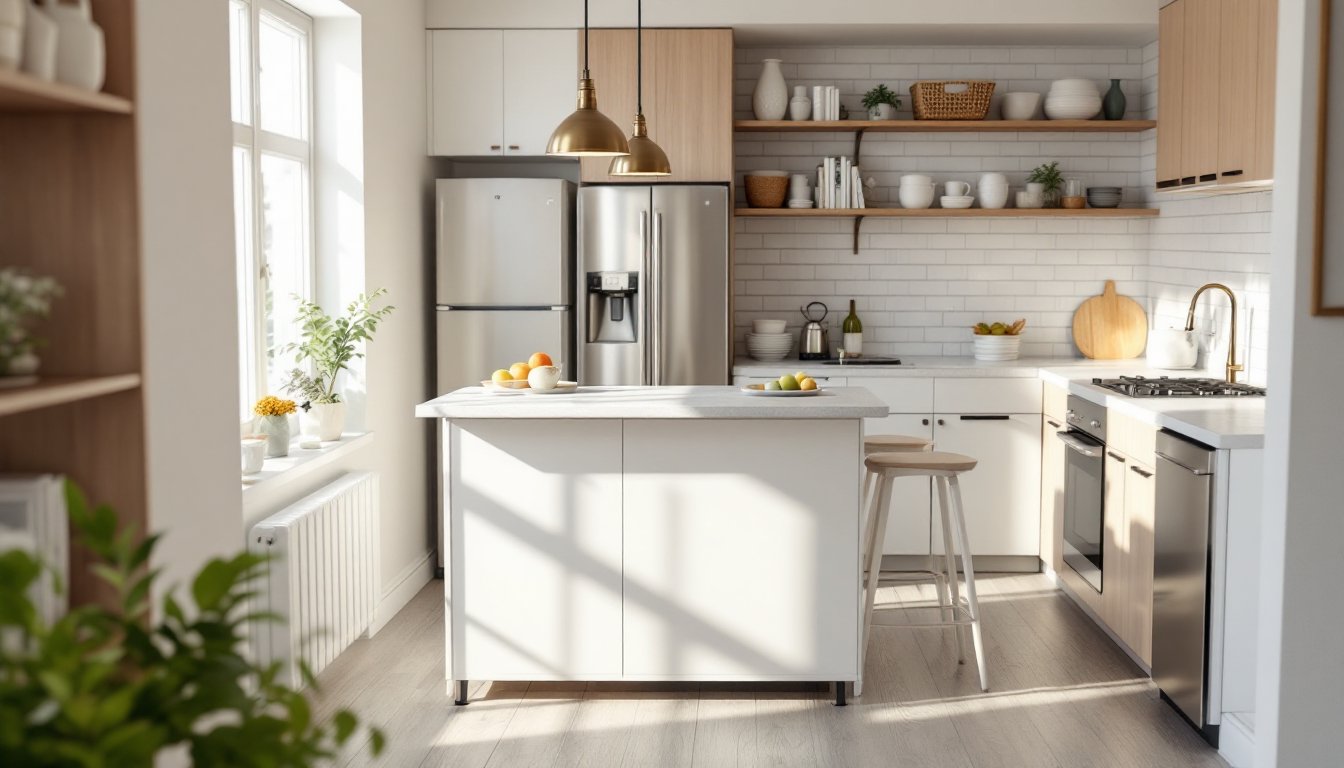
The real magic of a small-kitchen island is hidden storage. A fixed island gives you cabinets, drawers, and shelving that simply don’t exist elsewhere. Stack deep drawers on one side and a closed cabinet on the other. Open shelving on the back side (facing into the rest of your kitchen) can hold cookbooks, baskets, or serving pieces, turning visual clutter into intentional decor.
Incorporate a sink or cooktop if code allows and water/gas lines permit. A prep sink under a window on your island is genuinely useful. It keeps you from hogging your main sink during meal prep. A cooktop requires venting: that’s where costs and complexity climb. Many small kitchens can’t accommodate island range venting without extensive ductwork, so weigh this carefully before planning.
Another trick: use the overhang creatively. A 15-inch counter overhang on one side lets people sit and eat: the same overhang on the opposite side can nestle shallow shelving or a wine fridge. A narrow dishwasher or beverage cooler (24 inches wide) fits under many islands. This transforms dead space into functional storage that pulls weight in a tight footprint.
Sized correctly, an island becomes the heart of a small kitchen rather than a space hog. The key is planning every inch: no wasted depth, no unused corners. This is where small space kitchen solutions shine, they demand intentional design, which often yields more livable results than sprawling layouts with vague open areas.
Material and Style Choices for Small Kitchens
Material choices affect both visual weight and durability in tight kitchens. Light wood (oak, maple, birch) or white painted cabinetry make islands recede visually, opening up the space. Butcher block or reclaimed wood countertops add warmth without the bulk of dark stone. If you go with granite, quartz, or marble, a light shade (white, gray, cream) is safer than black or deep colors, which anchor the eye and make islands feel heavier.
Contrast can also work. A white painted base with a dark wood countertop creates visual interest and definition. The key is balance: if the rest of your kitchen is light, let the island be the accent. If your cabinets are dark, keep the island lighter to prevent a boxed-in feeling.
Steel or industrial accents (open shelving brackets, stainless steel trim) are practical and trendy. A mix of materials, wood base, concrete countertop, steel shelf supports, looks intentional rather than cramped. Just avoid pattern overload. One geometric backsplash or decorative feature is enough: too many styles fighting for attention make small spaces feel chaotic.
According to resources like Apartment Therapy, small-space kitchens benefit from materials that combine function and restraint. Painted MDF (medium-density fiberboard) is affordable and finishes cleanly. Solid wood is durable but pricier. Laminate countertops are budget-friendly and come in realistic finishes: they’re practical if you’re not ready to commit to high-end materials. Choose what suits your timeline and budget, but commit to clean lines. Clutter hides poor design: minimalist material choices expose bad proportions quickly.
Space-Saving Installation Tips and Considerations
Before you order materials or call a contractor, take precise measurements. Measure floor-to-ceiling height, wall-to-wall width at multiple points (some older homes are out of square), and account for existing appliances and their door swings. A 36-inch fridge door opening into your island path is a deal-breaker. Mark these constraints on graph paper: it sounds old-fashioned, but it forces you to think before buying.
Floor prep is critical. An island sits on your existing floor, so level it first. If your floor dips or slopes, a floating island will look uneven and feel unstable. Shim the base during installation: don’t assume the floor is flat. Uneven seating is annoying and screams DIY work. Use a laser level or long straightedge to verify. It takes an extra hour and saves frustration later.
Electrical outlets in an island are valuable real estate. Code requires GFCI protection for outlets within 6 feet of a sink. Plan for at least two or three outlets on the island’s perimeter: USB-charging outlets are a nice touch for modern kitchens. Running a dedicated circuit from your panel to the island is ideal, though it means fish-wiring through walls or floors. This is a job for a licensed electrician in most jurisdictions, don’t skip permitting to save money.
Plumbing, if you’re adding a sink, requires a shutoff valve, drain trap, and proper venting. The vent stack needs to tie into your existing vent system, which may route up through a wall or ceiling. Again, this usually requires a licensed plumber and a permit. Cosmetic islands are DIY-friendly: utility islands are not.
For a truly small kitchen (under 80 square feet), a fixed island may feel cramped no matter what you do. A rolling cart island or a peninsula (an island attached to one wall on one end) frees up floor space and gives you flexibility. A peninsula uses one less wall, so you get storage and seating without the full floor footprint penalty.
Finally, measure twice, order once. Island bases and countertops are not cheap, and returning custom pieces is a hassle. Account for the thickness of the countertop (usually 1.5 inches) and the overhang (typically 10 to 15 inches). A 30-inch-wide base becomes 33 inches with an overhang, measure existing doorways and pathways with that in mind.
Conclusion
A small kitchen doesn’t rule out an island, it just requires smarter choices. Narrow fixed islands, rolling carts, and multi-purpose designs with built-in storage all fit compact footprints when you plan thoughtfully. Choose materials and finishes that feel light and open. Install utilities only when you’re ready to commit to the expense and the permitting process. Start with a hard floor plan, measure twice, and remember that prep work saves headaches. A well-designed island becomes your kitchen’s workhorse, adding function and charm without the sprawl.